Digitizing VHS Tapes Using Open Broadcast Software (OBS)
by Kyle Kreiger, Student Multimedia Design Center
Did you know you can breathe new life into your old VHS tapes—right here in Morris Library? The Student Multimedia Design Center (SMDC) makes it easy for University of Delaware students, faculty and staff to digitize VHS tapes into computer-friendly MP4 files using Open Broadcast Software (OBS)—a powerful free tool installed in our media studios.
Whether you’re preserving family home videos, documenting archival footage or backing up old recordings for class projects, our step-by-step guide below will show you how to digitize your VHS tapes using the resources available at SMDC.
1. Reserve a Studio Space
Book one of our digitization-friendly studios through the SMDC. Be sure to request the VHS remote from the SMDC desk when you check in.
2. Set Up the Room for VHS Playback
- Turn the Rack System Selector to “VHS”
- On the A/V Receiver, switch the Function Knob to “Rack” (See Figure 1 below).
- Set the screen input to “HDMI” (See Figure 2 below). These simple adjustments connect the VHS player to the room’s display and PC, allowing OBS to pick up the video feed.
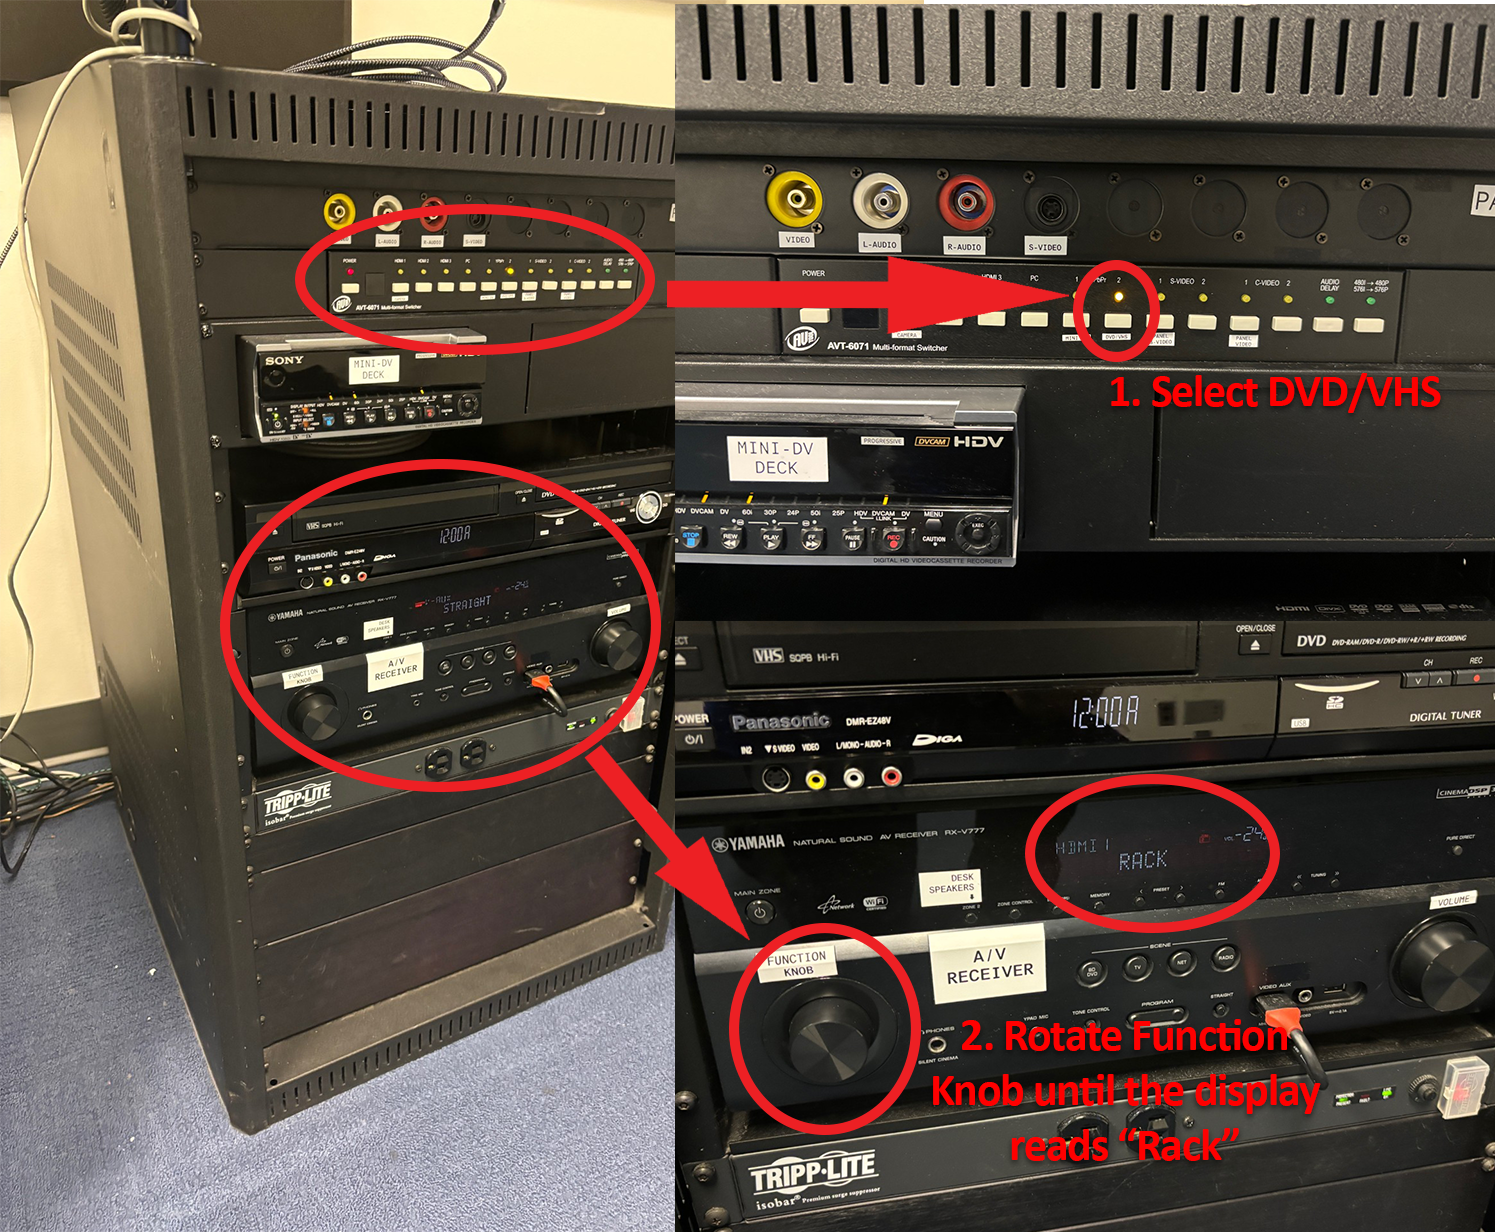
Figure 1

Figure 2
3. Load and Cue Your VHS Tape
- Insert your VHS tape into the player and use the loanable remote to navigate to the point where you want the recording to begin.
4. Launch OBS on the Studio PC
- Open OBS (Open Broadcast Software)
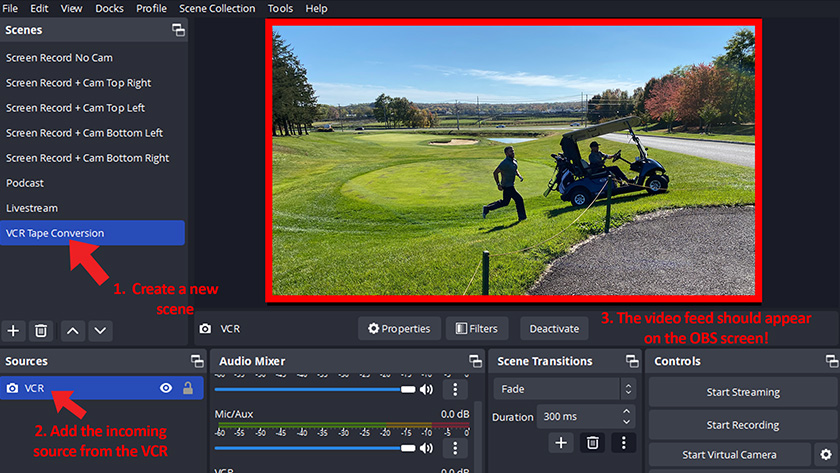
- Create a new Scene and add a Video Capture Source
- If properly connected, you’ll see the VHS feed appear in the OBS preview window (See Figure 3 below). You may need to resize or adjust the source for best visibility.
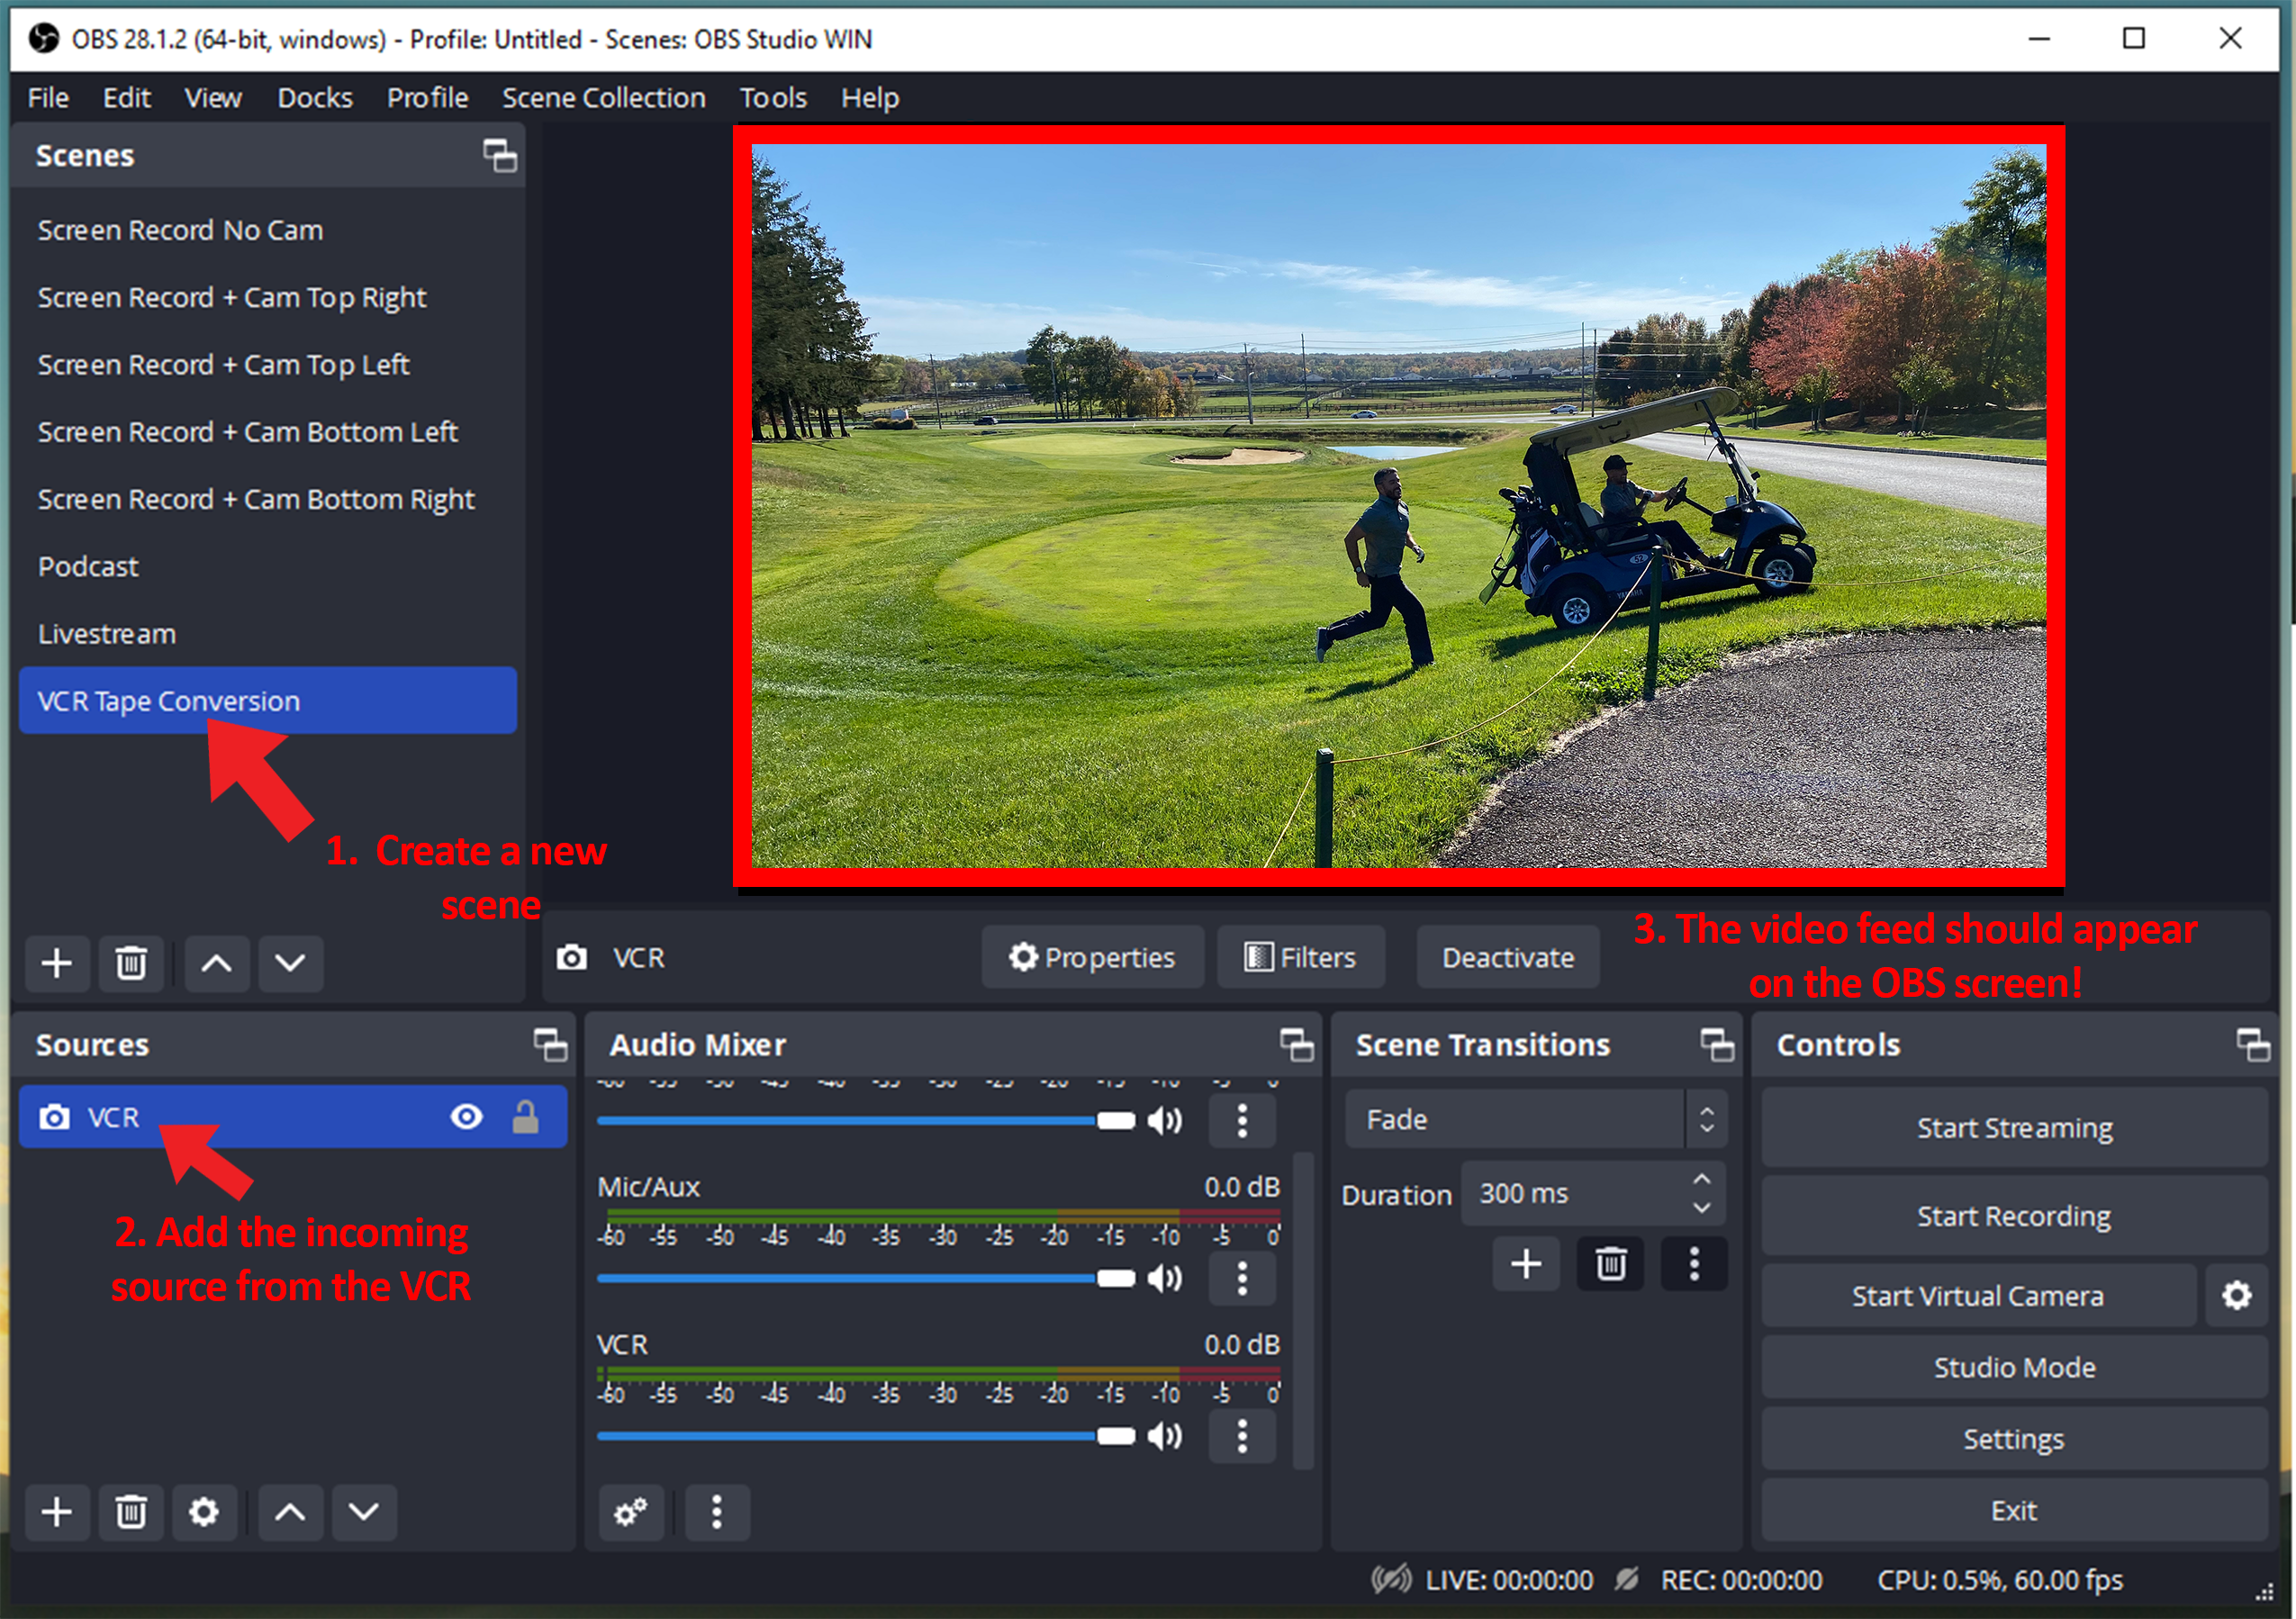
Figure 3
5. Set Your Recording Preferences
- Choose a save location in the OBS Settings under “Output” (See Figure 4 Below)
- Confirm both video and audio are coming through clearly.
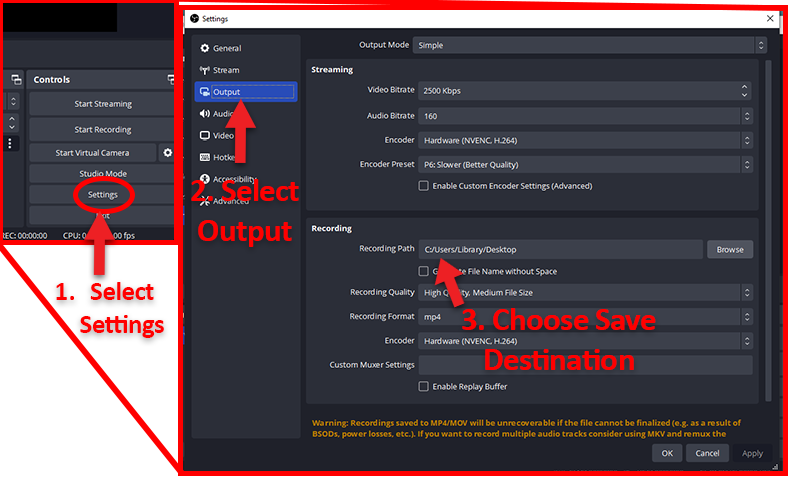
Figure 4
6. Start Recording
- Press Play on the VHS remote & Click Start Recording in OBS at the same time (See Figure 5 below).
- OBS will record in real time so let the tape play through until you’re finished.
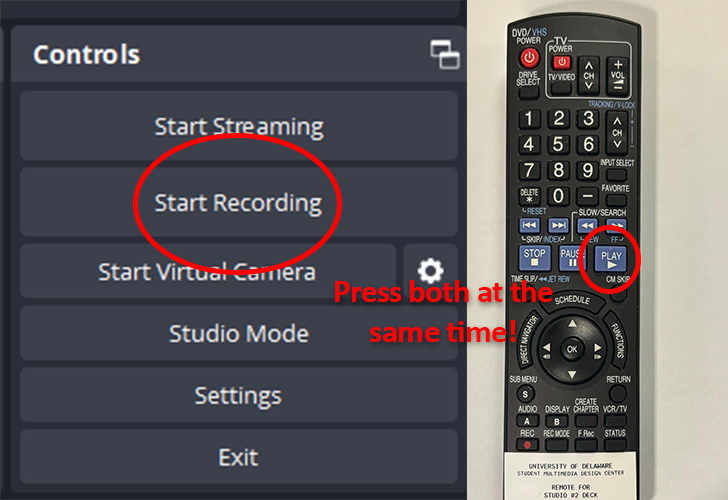
Figure 5
7. Stop Recording and Save Your File
- When ready, press Pause on the remote and Stop Recording in OBS. (See Figure 6 Below).
- Your new MP4 video file will appear in the folder you specified earlier
- Voila! — You’ve digitized your VHS tape in the Student Multimedia Design Center.
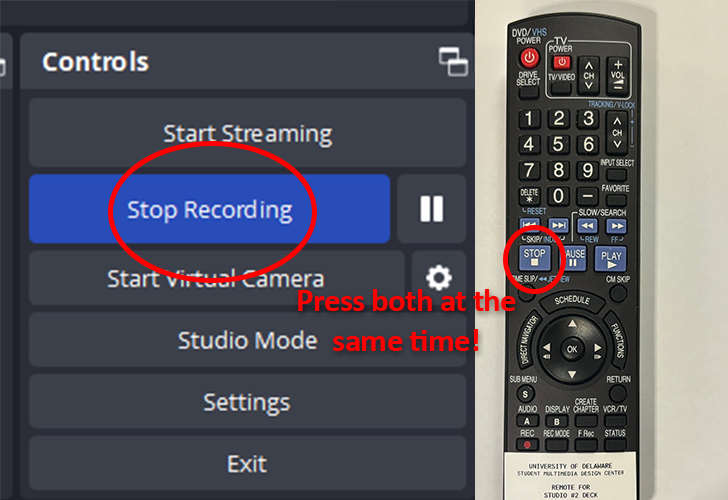
Figure 6
In addition to VHS tapes, the SMDC also supports digitization and playback of several other legacy media formats. At the Legacy Media Carrel, located in the Film & Video section, you can play and digitize formats including Betamax tapes, 8-tracks, audio cassettes and more. To use this equipment, simply book time at the SMDC desk.
The SMDC also offers additional tools for at-home and in-library use. You can borrow a USB turntable to digitize vinyl records or check out the Hi-8 Recorder Kit to convert Hi-8 tapes using your own computer at home. The USB turntable is available for four-hour checkout and the Hi-8 Recorder Kit can be borrowed for three days.
This video is part of the weekly series “Multimedia Tips and Tricks,” which shares content in response to frequently asked questions from the Student Multimedia Design Center. We’d love to hear from you. Please share your feedback with us by filling out our survey.