Poster Creation Tips: Image Resizing in PowerPoint and Photoshop
by Mike Gates, Student Multimedia Design Center
When creating research posters, you may discover that the poster you have been working hard on was created on a canvas or slide size bigger or smaller than needed. While this can be frustrating, in many cases the document can be resized and all your hours of work saved! The two most popular programs used to make poster documents in the Student Multimedia Design Center (SMDC) are Microsoft PowerPoint and Adobe Photoshop. We’ll go over how to resize entire posters, as well as some additional tips for selecting better quality images for your poster project.
Microsoft PowerPoint 365
In PowerPoint, posters can be designed on a single slide that is set to a dimension of your choosing up to 56” x 56”. If you find that you need to resize your poster, you can do so easily by opening the “Design” tab in the top menu bar and clicking on the “Slide Size” button. * Please note that posters printed at the SMDC must be no larger than 36” in one dimension for Glossy, Matte and Canvas media, and no larger than 42” for adhesive fabric media).
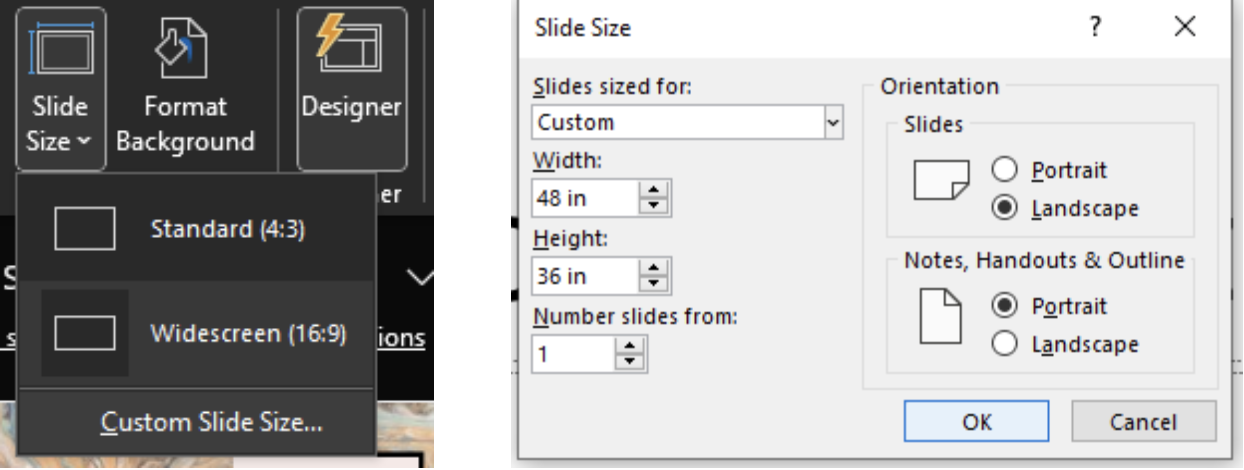
Choosing “Custom Slide Size…” in the menu that appears will open a window that lets you choose the slide width and height in inches. Select the new dimensions for the slide and click OK. A dialog box will appear with two scaling options, choose “Ensure Fit” so that all the objects on your poster remain after the resizing takes place. This will require that you rearrange your content by resizing text boxes, rearranging photos, etc.

A handy tip is to hold down the Shift key on your keyboard when resizing images on your slide as it will proportionally scale the photo so that it is not stretched or skewed!
Microsoft PowerPoint is available for use on most computers in Morris Library including those in the: Information Room, Reference Room, and Student Multimedia Design Center.
Adobe Photoshop 2024
Whether you are designing a poster entirely in Photoshop or simply need to resize a PDF or image file, the process for changing the dimensions of a file in Photoshop is quite simple!
If Using Photoshop to Resize an Image Only
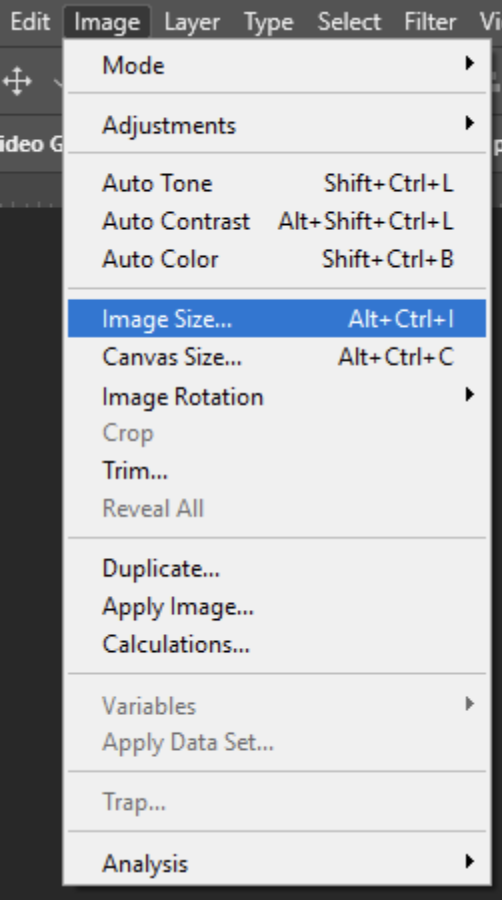
After opening your file in Photoshop, navigate to the “Image” menu in the top menu bar and choose the “Image Size…” option.
In the window that appears, you may change the width and/or height of the entire image. It is recommended to keep the option for constraining the aspect ratio of the image turned on (the chain-link icon to the left of the Width and Height fields). This will scale the image without stretching it disproportionately. After choosing your dimensions, click OK.
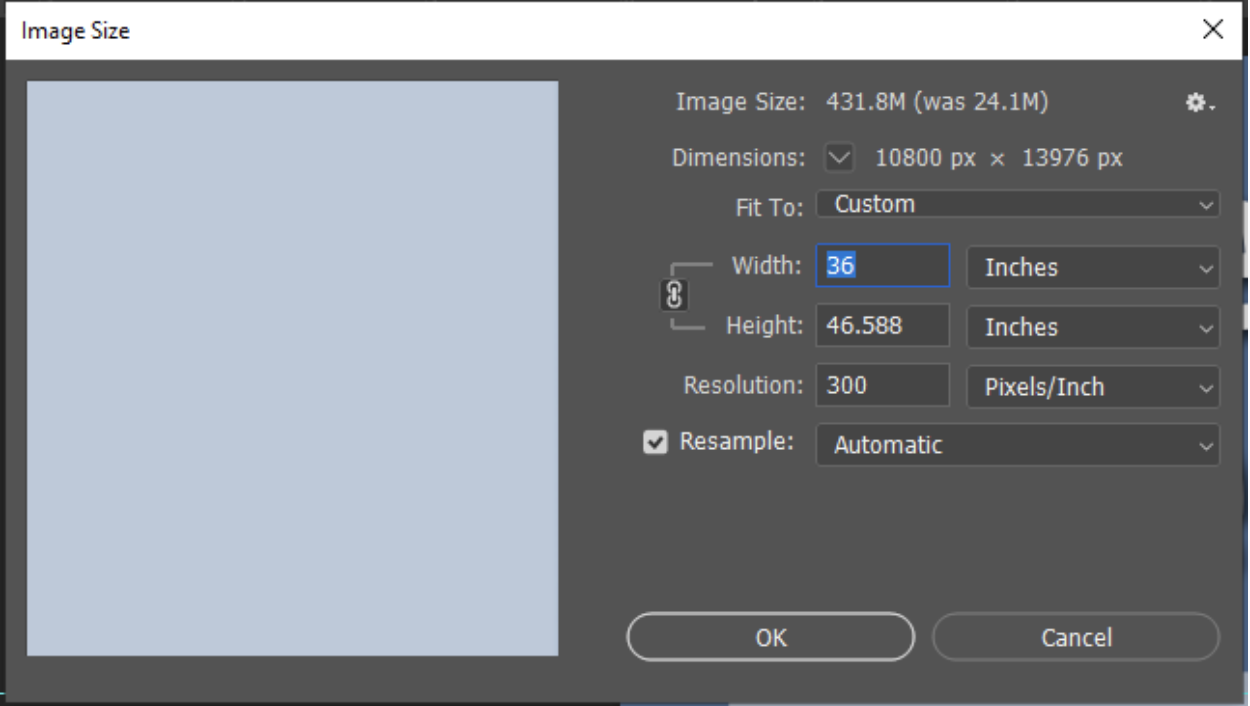
Your image should now be the desired dimension and can be saved for printing. *Please note that the SMDC requires posters be saved as a PDF and given to staff at the service desk on a flash drive).
If Using Photoshop to Design a Poster
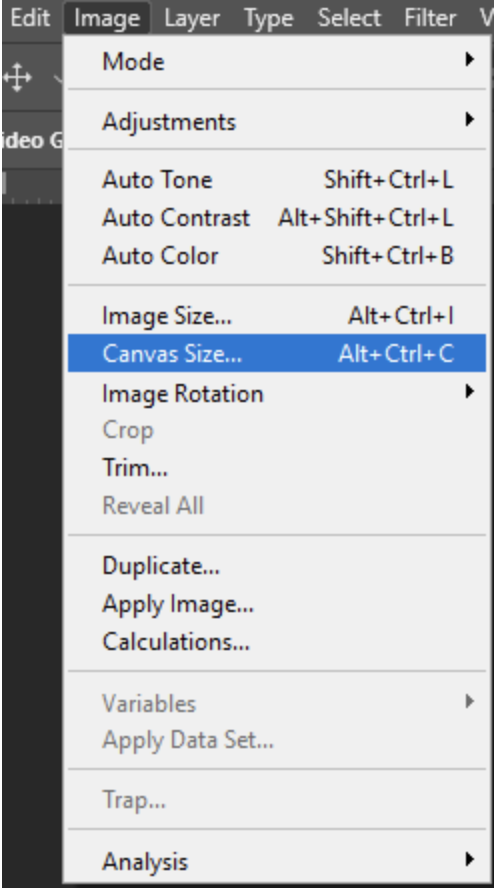
If you are designing a poster in Photoshop and wish to change the dimensions of the poster, navigate to the “Image” menu in the top menu bar and click on “Canvas Size…”
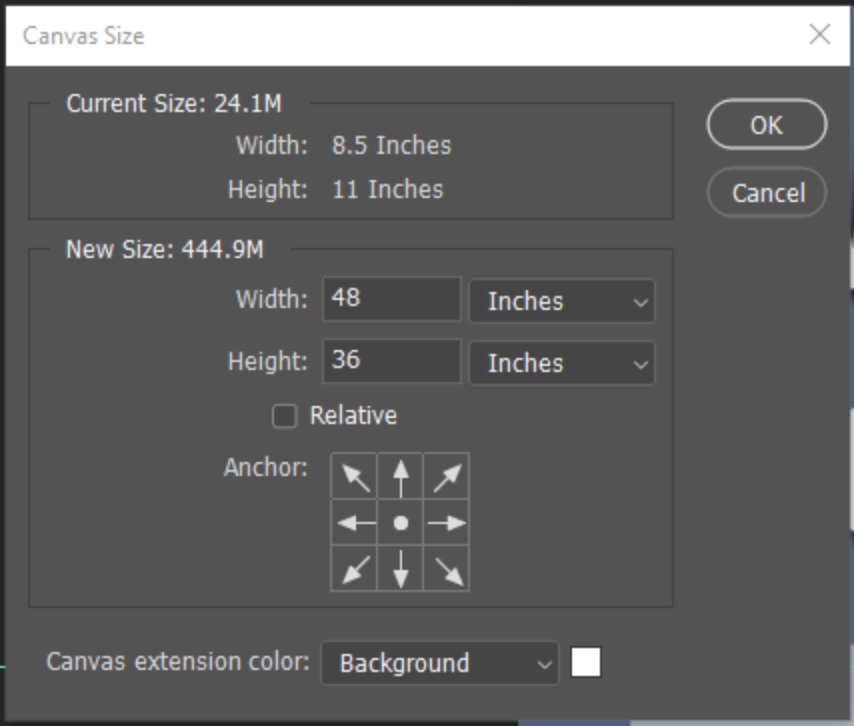
In the window that appears, you may enter the new dimensions you wish the poster to be and click OK. If the canvas size is reduced, objects that fall outside the canvas edge will be hidden. But not to worry, they can be selected and moved back onto the canvas area.
Additional Tips
Here are some tips that will help you create better posters in both PowerPoint and Photoshop:
- When grabbing images from the internet, use browser tools to help find higher resolution images. Have you ever become frustrated that many of the images you paste into your poster document are grainy and low-res? Filter out all the low-res images by using available features on the web browser you are using. For example, with Google Image Search you may select the “Tools” option which will bring up a menu above the search results. In the first menu option you can select the size of the image results returned to you, it is recommended to choose “Large.”

- When taking pictures with your cell phone, pick a high-resolution setting (usually) indicated in megapixels (MP).
- Choose high-contrast colors for your text and backgrounds. Avoid using bright text colors, such as yellow, on bright white backgrounds! This can be very hard to read and may cause eyestrain.
Conclusion
If you are looking for a starting point in poster creation, visit the Large-Format Printing section of the SMDC Print, Copy, Scan webpage to download poster templates for use in PowerPoint. These templates provide a great starting point for making a poster both plain and branded versions for research posters are available.
If you’d like some more hands-on guidance on creating posters, stop by the SMDC Service Desk during open hours for assistance, or schedule a consultation with our Emerging Multimedia Technologies Librarian.
This article is part of the weekly series “Multimedia Tips and Tricks,” which shares content in response to frequently asked questions at the Student Multimedia Design Center. We’d love to hear from you. Please share your feedback with us by filling out our survey.
